Attaching the ball neck
WARNING Danger of accident‑ and injury due to incorrectly installed and secured ball coupling
If the ball coupling has not engaged, it can become detached during driving and endanger other road users.
Engage the ball coupling as described and ensure that it is securely installed.
WARNING Danger of accident due to non-engaged ball coupling
If the ball coupling has not engaged, the trailer can become detached.
Always engage the ball coupling as described and ensure that it is securely installed.
Use the parking brake to secure the vehicle against rolling away.
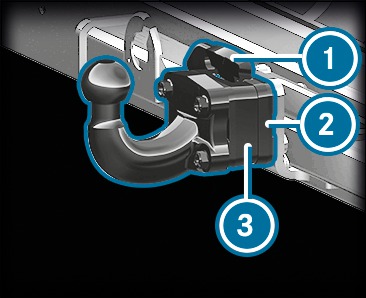
Pull safety spring  of ball coupling
  upwards in the direction of the arrow, push it backwards and hold it in this position.
of ball coupling upwards in the direction of the arrow, push it backwards and hold it in this position. 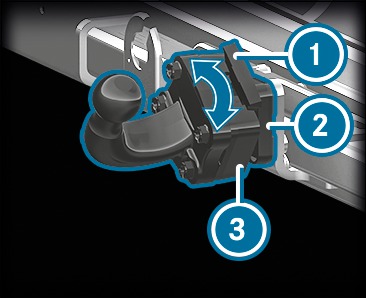
Place ball neck onto ball neck mount  and turn it in the direction of the arrow until ball neck points vertically upwards.
onto ball neck mount and turn it in the direction of the arrow until ball neck points vertically upwards. Re-attach safety spring .
. If the ball neck is dirty, clean it before installation.
Overview of lashing points
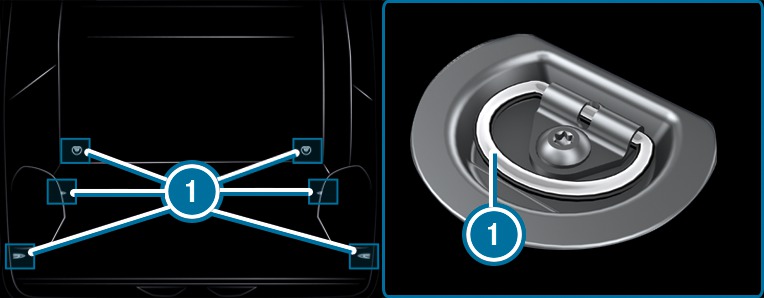
Lashing points (example: panel van without loading rails)
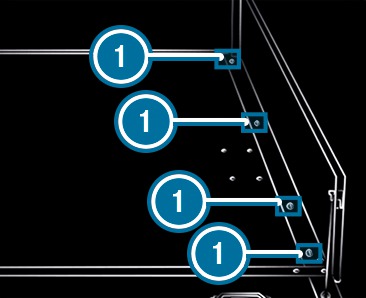
Lashing points (example: platform vehicle)
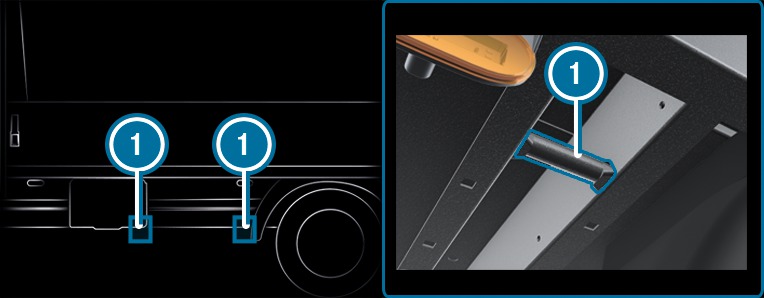
Lashing points (example: platform vehicle)
Once you have removed the platform dropsides, you can use the lashing points on the bottom left and right of the crossmember.
Secure loose loads, in particular on the load surface of a platform vehicle, with an approved lashing net or tarpaulin.
Always fasten the lashing net or tarpaulin to all available lashing points. Make sure that the fastening hooks are secured against accidental opening.
If your vehicle is equipped with loading rails in the load compartment floor, you can place lashing rods directly in front of and behind the load. The lashing rods directly absorb the potential shifting forces.
Securing loads on the load compartment floor by lashing them down is only recommended for lightweight loads. Lay anti-slip mats under the load to assist in securing it.
Overview of the front stowage compartments
Observe the notes on loading the vehicle More.
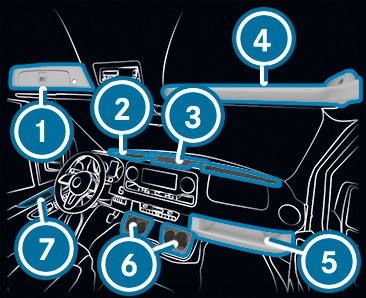
Stowage compartment with cover, depending on specification


